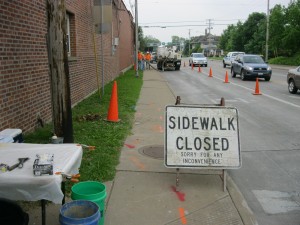
Protecting Workers from Underground Hazards
Jul 12th, 2014 | By Matthew Boardman | Category: Health and Safety
Americans strike underground utilities about once per minute on average according to a report last year by the Common Ground Alliance, a group of utilities, fire marshals, and others interested parties focuses on protecting underground utility lines and the safety of people who dig near them. Perhaps you heard one of these stories:
In February 2013, a construction crew working outside of a popular Midwest restaurant unintentionally struck and damaged a natural gas line, sparking an explosion that injured at least 12 people and killed one.
Sounds pretty sensational, doesn’t it? It was a sensational incident, tragically, since there was loss of life and limb, and the media coverage was intense.
In this case, the company that struck the utility line routinely dealt with the hazards of digging around underground utilities, but they still had an accident; less experienced workers would face even greater risk when they dig or drill in the ground. How do we protect these workers who do subsurface work? Although nothing can guarantee a safe outcome, following the steps outlined below can minimize the risk of incurring a potentially dangerous subsurface hazard.
Step 1: Gather Initial Information
One of the first steps in preparing to safely execute intrusive (subsurface) work is identifying the person at the project site who has the greatest historical knowledge about the site. Many times, there will be someone associated with property ownership that knows the site history and has seen the site change over the years. In a best case scenario, this individual will visit the site with you to share his or her knowledge of the site and point out noteworthy features.
Next, you’ll want to gather as much historical information as possible about the project site. Construction diagrams, utility drawings, Phase I environmental site assessment reports, and aerial photographs of the target property are logical places to start. “As-built” drawings, construction drawings that have been marked up to reflect changes that occurred during the construction process, can provide valuable information on the location of subsurface utilities, but they too must be used with caution — some sites won’t have as-built drawings at all, some as-built drawings may have been prepared based on memory rather than precise measurements months or years after construction was completed, some sites may have been modified after the as-built drawings were prepared, and some of the as-built drawings may be so old that they are no longer legible or reliable.
With a knowledgeable site contact and relevant historical data, employees can begin to consider the project site in reference to where they need to disturb the ground. This gives more clarity to where on the property hazards may lie with the goal of avoiding those hazards.
Step 2: Locate the Utilities
The locations of subsurface utilities are commonly identified using geophysical instruments and are marked using colored paint or flags. In some jurisdictions, utility locator services must be notified before commencing subsurface work.
Geophysical Investigation
Of the many interworking pieces of the subsurface puzzle, the most publicized and well known is the “811” or “One-Call” system, otherwise known as public utility identification and mark out. Every state in the United States has rules about digging, both for contractors and for homeowners, and failing to have a property marked out and then striking a utility comes with a myriad of potential consequences. On the low end of the scale, you could be responsible for the costs associated with repair of the damaged utility. On the high end, someone could be injured or killed by striking a dangerous utility, such as an energized electrical line.

In every U.S. state, it is a requirement to contact the local utilities before digging so that the utility owners have an opportunity (typically at least 48 hours) to locate and mark the utility lines on the target property. Many states operate a one-stop shop for utility location, such as the “811” call pictured above. Under this arrangement, one phone call mobilizes the locating of all of the necessary utilities (gas, electric, water, etc.).
Beware — private properties are handled slightly differently. In most cases, the public utility markers will typically mark just up to the property line and will not mark private property. This means you’ll have an indication of where the utilities enter the property but not necessarily where they lie on the property. Workers will need to “connect the dots” using the information gained in Steps 1 and 2 above to understand the suspected utility path.
Also be advised that there is an industry-accepted margin of error of eighteen to twenty-four inches, meaning that the actual location of the subsurface utility may be up to two feet from the actual marking! Public utility location services most often use technology called electromagnetic detection, otherwise known as a “cable avoidance tool” or “CAT.” This technology has become the industry standard because of its relative ease of use and portability, but it cannot detect non-metallic subsurface lines or structures.
Because of this, if digging or excavating is to be done on private property, it’s wise to engage a private geophysical investigation firm. They’ll identify and mark utilities on private property, and they may use more effective technology in doing so. Ground-penetrating radar, better known as “GPR,” is a technology that can identify non-metallic materials (soil, concrete, etc.) and voids in a material, so it can often identify PVC lines, concrete vaults, and terracotta pipes where electromagnetic technology cannot. The downside is that GPR can be considerably more costly than electromagnetic detection.
For trenches or mass excavations it is wise to have the utility locator “scan” the entire proposed excavation plot to provide some confidence that there is nothing in the path of the excavator bucket. Ultimately, public and private utility location services will help you better understand what hazards may lie beneath the surface where you need to dig, and better prepare you to avoid them.
Step 3: Walk the Site
Before any worker even thinks about putting a shovel in the ground, a thorough walk around the project site should be conducted. The first task you might consider is to mark with paint where the ground will be disturbed. This will give others on site a better understanding of how their tasks might intertwine with the proposed ground disturbance locations. Ideally, the site walk will be conducted with knowledgeable site contacts as when it comes to identifying potential hazards, two sets of eyes are better than one. During the site walk, you’re searching for above ground clues of potential hazards that lie beneath the ground. As an example, picture a fire hydrant. What you see above the ground is the actual hydrant, but two to four feet below the ground runs the pressurized piping that supplies the water to the hydrant when the valve is opened.

There are many subsurface hazards for which there may be clues above the surface of the ground. These include:
- Fire hydrants and post indicator valves
- Electrical transformers
- Gas line markers
- Electrical conduit running into the ground
- Utility manholes
- Sewer drains and cleanouts
- Underground storage tank fill ports and vent pipes
- Water meters
- Natural gas meters
This list of above ground clues generally includes all non-native objects that can be viewed at the ground level. But also, don’t forget about clues that indicate that the ground has been disturbed previously. “Scars” on concrete or pavement, or changes in surface material can be an indication that the ground was disturbed previously. Changes in soil structure or depressions in the surface of the soil may be indicators that there is something beneath the top layer of soil. Those conducting site walks must be cognizant of these types of indicators also.
Risk Management 101
Now is a good time to refresh the fundamental theories of risk management. A principle concept in any risk management theory is the avoidance of a hazard. Considering the high risk associated with some common underground utilities, the best policy is to avoid working in close proximity to known hazards. Many organizations that have mature “ground disturbance” processes require diggers or excavators to move a proposed ground disturbance location at least ten feet from an identified or suspected underground utility. If avoidance is not possible and the ground must be disturbed in close proximity to a known utility, some companies require a special permit to be completed before proceeding. The bottom line is, if utilities are near, move the ground disturbance location further away. When in doubt, step it out! If stepping out is not possible, perhaps isolating the hazard is possible, such as deenergizing electrical lines or bleeding pressure from pressurized pipelines.
Step 4: Conduct Physical Clearance
So, after reviewing available documentation about the target property, conducting a thorough site walk and identifying above-ground clues of underground hazards, and having the property marked out by utility location services, we’re ready to finally break ground, right? Not so fast. There is one final and important risk management technique that should be employed, and that is “physical clearance” of the ground-disturbance locations to confirm that there are no unidentified utilities in the path of the ground disturbance location.
As was mentioned previously, even with a utility mark out, there is an industry-accepted margin of error. Too, it takes a human being to operate geophysical location tools such as CAT and GPR, and we all know that people make mistakes. Errors in using the technological tools or in interpreting the results of the scan can provide false confidence. So the final step in the subsurface puzzle is confirming that there are no underground utilities in the path of the proposed ground disturbance.
There are several techniques that are often used to physically clear a ground disturbance location. One of the most common, because it is inexpensive and non-mechanized, is the use of hand tools such as hand augers, hand shovels, or other hand tools. The downside to using hand tools on these projects is they expose the user to potential hazards. Not only is the potential for musculoskeletal injuries a reality when using these tools, but if a conductive hand tool were to pierce a live electrical line a severe injury or even death could occur.
Technologies that are becoming more common in the world of subsurface work are air and water vacuum trucks. These technologies use air or water to break up the earth and then vacuum away the soil. These technologies are very effective at creating an opening in the soil, sometimes referred to as a “pothole,” so that the worker can visually confirm that there are no obstructions in the path of the proposed ground disturbance location. While there is still a good deal of manual labor to be performed, workers are better protected against the risk of direct contact with an electrical line. Furthermore, these technologies are relatively non-destructive and will generally not damage a utility line should one be accidentally encountered. The downside of using these technologies is they are more costly than using hand tools to physically clear the ground disturbance location.
Other important aspects of physical clearance are how deep and wide to clear a ground disturbance location. Industry standard for the depth of physical clearance is a minimum of five feet unless there are utilities in close proximity to the disturbance location. In this case, industry standards suggest a physical clearance of at least eight feet. The width of the physical clearance depends largely on the type of work that will follow. If a post-hole auger will be advanced into the ground, the width of the physical clearance should ideally be 20% larger than the diameter of the post-hole auger. Experience has shown that many a utility has been damaged on the far outer edge of an auger. If a hand auger is being used to physically clear a location, it may be necessary to “triangulate” around the location, meaning advancing the hand auger on three or more points on the diameter of the proposed disturbance path. Using this technique provides greater confidence that there isn’t a utility hiding on the perimeter of the path of the auger.
Step 5: Proceed…with Caution!
When all preparatory steps have been completed and all indications are that it is safe to dig, workers can carefully proceed with ground disturbance. If there are utilities in close proximity, take the time to identify the location of the nearest shutoff so that if the utility is struck, it can be shut down quickly.
If an accident does happen during digging and a utility is damaged, it is the responsibility of the digger to notify the utility owner. Finally, as should be the case with any incident, if a utility or other obstruction is contacted during digging, the incident should be thoroughly investigated to determine the causes of the incident and actions that can be taken to prevent similar events in the future.
Moving Forward Safely
Let’s review the basic steps that will allow for a safer ground disturbance project:
STEP 1: Gather and carefully review site drawings, blueprints, aerial photographs, etc., to identify potential hazards and guide ground disturbance location decisions. Discuss your excavation plans with long-time, knowledgeable people to identify additional hazards that are not in the documents.
STEP 2: Arrange for (ideally) both public and private geophysical investigation. Remember that it may take 24-72 hours for public utility location to respond to your request!
STEP 3: Conduct the site walk. This should be done with the person that knows the site best and in conjunction with public and private utility location services. Identify and assess above ground clues of underground hazards. Consider the proposed ground disturbance locations in relation to identified utilities and/or other potential underground hazards. When in doubt, step it out!
STEP 4: Physically clear each ground disturbance location as final confirmation that there is no underground hazard in the path of the planned work.
STEP 5: Proceed with caution.
One final recommendation for organizations that conduct subsurface work —develop a protocol for ground disturbance work that sets clear expectations around requirements for eliminating and/or minimizing hazards. Train staff and continually reinforce these important concepts and conduct periodic audits to verify that workers are following procedures. In the end, in the case of underground hazards, what you don’t know can, in fact, hurt you!
Five Common Causes of Accidental Utility Strikes!
- Failure to identify/recognize underground hazards
- Over-reliance on inaccurate site drawings or other records
- Inaccurate utility location or marking
- Improper use of utility locating technologies
- Failure to confirm known or suspected utility locations
About the Author
Matthew J. Boardman, CSP, is a Divisional Safety Leader for Environmental Resources Management (ERM), where he supports project teams in managing subsurface-related hazards.
Photographs: Hole by Giovanni Miniato, S. Bonifacio, Verona, Italy; Sidewalk Mark-out by Brett Carney, St. Louis, U.S.A..
Return to the EHS Journal Home Page

